When working with Docker, we create images from a file called a Dockerfile — like a recipe that describes step by step how the image should be built. It usually starts with a base image, and from there Docker runs instructions to add dependencies, install packages and libraries, generate keys, create users and directories, and copy files.
Each instruction in the Dockerfile (RUN, COPY, ADD, USER, etc.) creates a new layer. Think of it as stacking containers on a ship (hence the name “Docker”): the final image consists of several layers placed one over the other, each representing a change from the previous one.
Each layer has its own unique hash that identifies it. Together, they form a kind of “chain” — similar to a blockchain — because every new layer depends on the content and hash of the one before it, as well as the command that created it. If anything in a layer changes (for example, the dependency file used during a package installation), its hash will change too, and Docker won’t be able to reuse the cache for the layers that come after it.
You can inspect these layers with commands like docker history or docker image inspect, which show the sequence of instructions and how the image was built. This insight is key to taking full advantage of Docker’s build cache, because it reuses existing layers whenever the previous content and commands haven’t changed.
Lets look at an example, from a ruby image when building the image using the command. docker build . -t outimage
# Dockerfile

# Use the official Ruby 3.3.1 image as the base image
FROM ruby:3.3.1

# Create the directory where the application will reside
RUN mkdir -p /home/app/

# Set the working directory for subsequent commands
WORKDIR /home/app/

# Copy all files from the "source" folder on the host to the working directory in the image
COPY source/* /home/app/

# Install the application dependencies from the Gemfile
RUN bundle install
We can then run docker image inspect outimage | grep sha and docker history outimage to view the image’s hashes and commands, and compare them with those from the base image, ruby:3.3.1
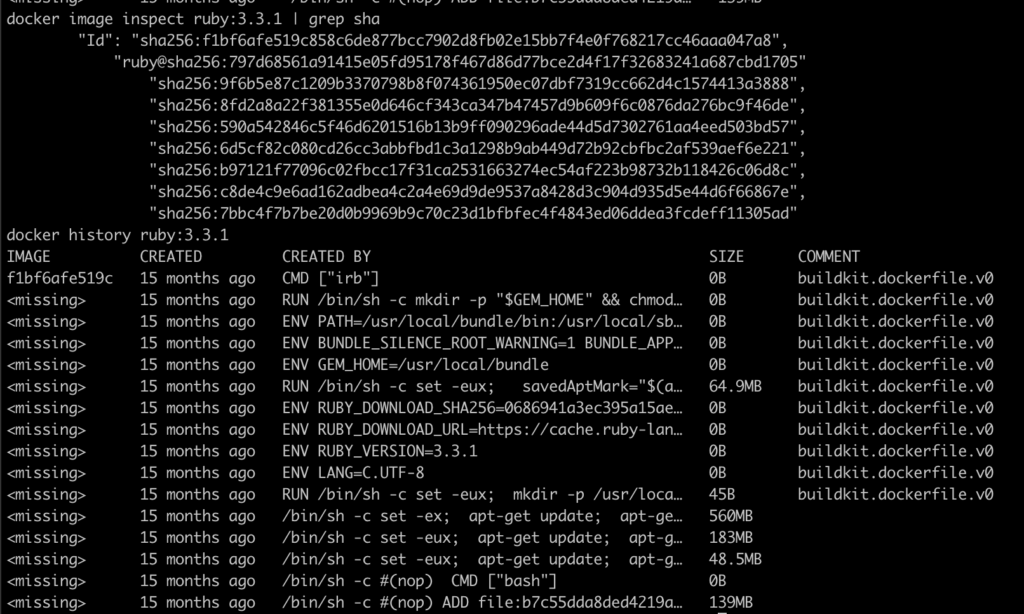
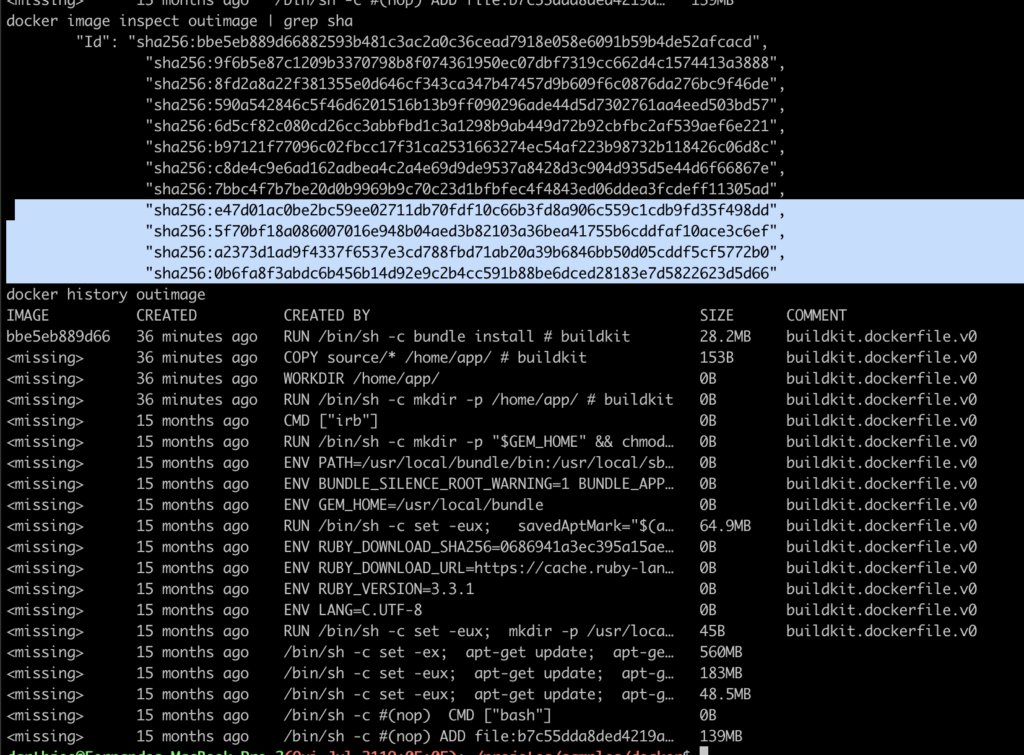
We can see that the last hash from ruby:3.3.1 — sha256:7bbc4f7b7be20d0b9969b9c70c23d1bfbfec4f4843ed06ddea3fcdeff11305ad — also appears in outimage. It’s the final hash before the four new commands (highlighted) generate their own new hashes.
Rebuilding the image won’t change the hashes, because Docker sees that nothing in the previous layers or commands has changed. The only exception is when you build without using the cache — for example, with docker build . --no-cache -t outimage — which forces every command to run again, regardless of the cache.
Now, looking at the Dockerfile, we can spot two key steps: COPY source/* /home/app/, which copies the files into the container, and RUN bundle install, which installs the dependencies (Ruby gems, Node packages, etc.).
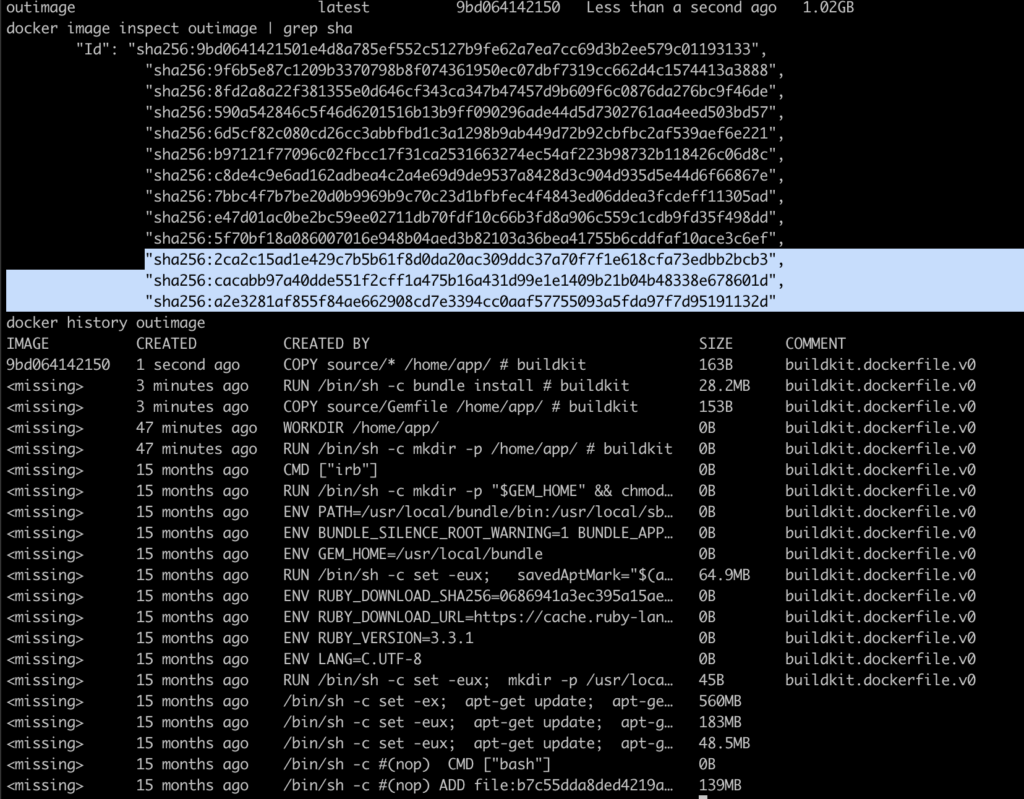
Because of this order, and change in any file in the source folder (as should happen on any development) would alter the copy of files, invalidating that step in the cache and forcing the installation of dependencies to happen again as it can be seen in the highlighted hashes that changed below
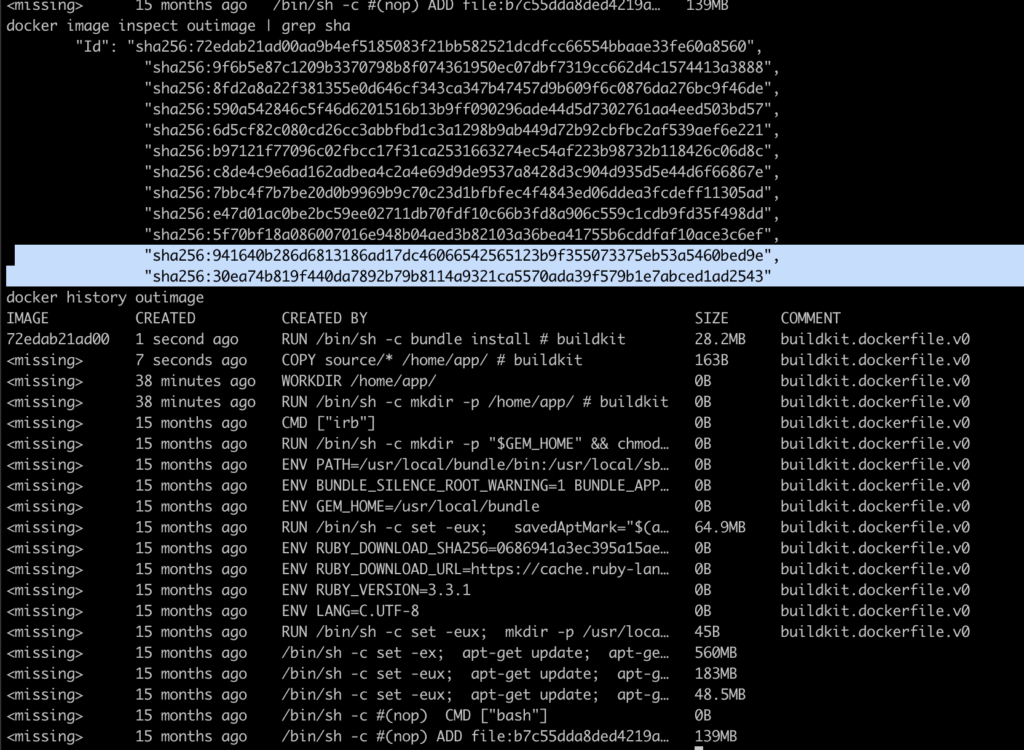
The problem is, Installation of dependencies is a slow step, so this is exactly where we want to take advantage of the cache.This can be achieved by splitting the copy of files and reordering the steps
# Dockerfile

# Use the official Ruby 3.3.1 image as the base image
FROM ruby:3.3.1

# Create the directory where the application will reside
RUN mkdir -p /home/app/

# Set the working directory for subsequent commands
WORKDIR /home/app/

# Copy the Gemfile (dependencies file)
COPY source/Gemfile /home/app/

# Install the application dependencies specified in the Gemfile
RUN bundle install

# Copy all files from the "source" folder on the host to the working directory in the image
COPY source/* /home/app/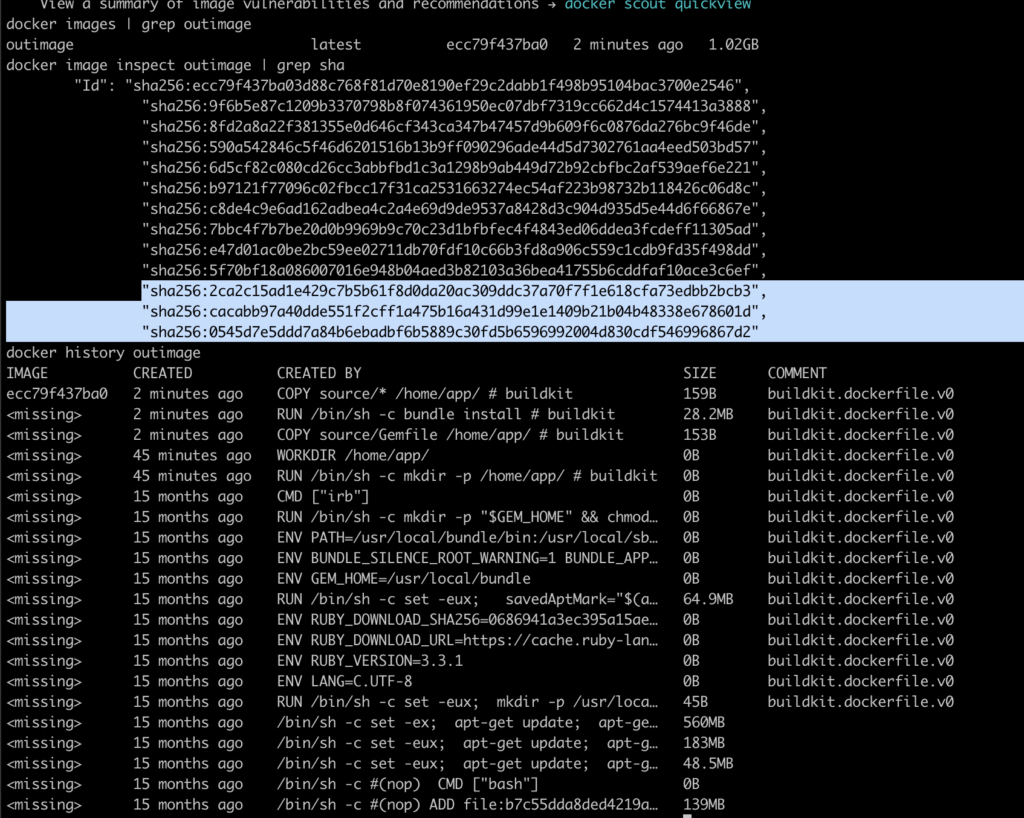
Now, a change in the files that are not defining the dependencies (Gemfile here) will not change the layer for installing dependencies, thus speeding the build of the image.
So, as a rule of thumb, slow steps that should not change much should be agglutinated in the beginning of Dockerfile while steps that represent changes constantly, like changes in the source files, should be the last steps
Leave a Reply